
Opencv 3.1 Tutorial Optical flow (calcOpticalFlowFarneback)
Opencv simple C++ tutorial and code to achieve optical flow and farneback optical flow of moving an object in OpenCV video. Let's check the video example and the achieved result on my blog. Working and well-described code is included.

Optical Flow Farneback parameters remarks
You need 2 images at least to calculate optical flow, the previous image (prevgray) and the current image (img). !! The previous image must be initialized first !! Both images have to be grayscale.
calcOpticalFlowFarneback(prevgray, img, flowUmat, 0.4, 1, 12, 2, 8, 1.2, 0);
- 0.4- Image pyramid or simple image scale
- 1 is the number of pyramid layers. 1 means that flow is calculated only from the previous image.
- 12 is the window size. Flow is computed over the window larger value is more robust to the noise.
- 2 mean number of iterations of the algorithm
- 8 is polynomial degree expansion recommended value is 5 - 7
- 1.2 standard deviation used to smooth used derivatives recommended values from 1.1 - 1,5
calcOpticalFlowFarneback(prevgray, img, flowUmat, 0.4, 1, 12, 2, 8, 1.2, 0);
calcOpticalFlowFarneback Example
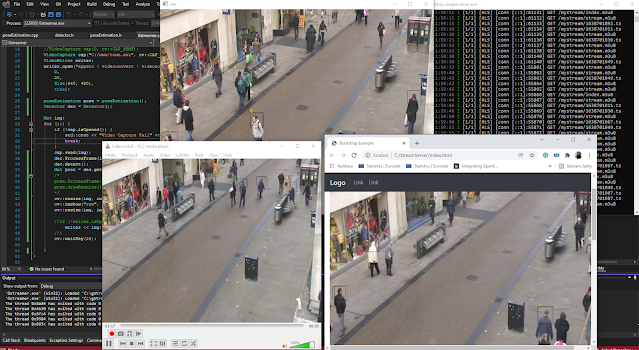
 video is captured at Old Town Square in
  .
.Opencv Tutorial C++ code calcOpticalFlowFarneback
#include "opencv2\highgui.hpp"
#include "opencv2\imgproc.hpp"
#include "opencv2\objdetect\objdetect.hpp"
#include "opencv2/video/tracking.hpp"
#include <vector>
#include <stdio.h>
#include <Windows.h>
#include <iostream>
using namespace cv;
using namespace std;
int main(int argc, const char** argv)
{
// add your file name
VideoCapture cap("yourFile.mp4");
Mat flow, frame;
// some faster than mat image container
UMat flowUmat, prevgray;
for (;;)
{
bool Is = cap.grab();
if (Is == false) {
// if video capture failed
cout << "Video Capture Fail" << endl;
break;
}
else {
Mat img;
Mat original;
// capture frame from video file
cap.retrieve(img, CV_CAP_OPENNI_BGR_IMAGE);
resize(img, img, Size(640, 480));
// save original for later
img.copyTo(original);
// just make current frame gray
cvtColor(img, img, COLOR_BGR2GRAY);
// For all optical flow you need a sequence of images.. Or at least 2 of them. Previous
//and current frame
// if there is no current frame
// go to this part and fill previous frame
//else {
// img.copyTo(prevgray);
// }
// if previous frame is not empty.. There is a picture of previous frame. Do some
//optical flow alg.
if (prevgray.empty() == false ) {
// calculate optical flow
calcOpticalFlowFarneback(prevgray, img, flowUmat, 0.4, 1, 12, 2, 8, 1.2, 0);
// copy Umat container to standard Mat
flowUmat.copyTo(flow);
// By y += 5, x += 5 you can specify the grid
for (int y = 0; y < original.rows; y += 5) {
for (int x = 0; x < original.cols; x += 5) {
// get the flow from y, x position * 10 for better visibility
const Point2f flowatxy = flow.at<Point2f>(y, x) * 10;
// draw line at flow direction
line(original, Point(x, y), Point(cvRound(x + flowatxy.x), cvRound(y + flowatxy.y)), Scalar(255,0,0));
// draw initial point
circle(original, Point(x, y), 1, Scalar(0, 0, 0), -1);
}
}
// draw the results
namedWindow("prew", WINDOW_AUTOSIZE);
imshow("prew", original);
// fill previous image again
img.copyTo(prevgray);
}
else {
// fill previous image in case prevgray.empty() == true
img.copyTo(prevgray);
}
int key1 = waitKey(20);
}
}
}


Hi Vladimir, I try to run your code, however it reported undeclared identifier: UMat. Is it only for GPU? Could you please inform how to run your code if I only have CPU? Thanks.
Hello. :)
I am just a guest.
GMat is defined in the OpenCV 3.1.
Thank you Juhong! Is UMat only for GPU?
Umat is basically for OpenCL/ CPU whereas GpuMat is meant for allocating device memory in Nvidia-based GPUs.
can you please tell how to calculate velocity using optical flow
yes find out the centroid and fps. do perspective projection and calculate speed
hello, can you share code for velocity calculation using optical flow....thanks
I do agree with all the ideas you have presented in your post. They’re really convincing and will certainly work. Still, the posts are very short for newbies. Could you please extend them a little from next time?..Keep this great work..
GMAT Training in Chennai
GMAT Coaching Chennai
Best GMAT Coaching Classes in Chennai
Thanks for sharing the very useful info about clanguage and please keep updating........
Thanks for sharing the c++ tutorial with us and I have learned new programming skills especially on Optical Flow Farneback parameters remarks. I will bookmark this site so that I can practice writing the shared programs on my own especially when I have finish accessing Guide on Assignment Writing.
Can anybody give me same code of Optical Flow with Opencv2, Python Language
hey bro can you you help same project in java
Sorry man, not a java person.
This blog is awesome and very informative keep Sharing this type of blog.
แตกใน xxx
Thanks, i will keep sharing and please share my blog. That helps to doing this. :)
If i give any video file as input to videoCapture then "cap.grab();" is returning false always. the code is working for vidoeCapture(0) (From webcam). need some help to debbug!!!
It's very interesting, can you introduce me?
สมัคร maxbet
บาคาร่า
บาคาร่าออนไลน์
People tired to find a relevant place where they can know real facts and myths about the topic mentioned by author of this blog. I want to help a lot of needy people through this blog to come up at my blog to know the real facts and myths regarding this topic. computer vision apps
Hey Man its a nice tutorial but how to modify the code for occlusion culling?
It would be nice if you share your thoughts!
This is very much interesting, thanks for sharing your ideas with us.
DevOps Online Training
Excellent blog I visit this blog it's really awesome. The important thing is that in this blog content written clearly and understandable. The content of information is very informative.
Oracle Fusion HCM Online Training
Oracle Fusion SCM Online Training
Oracle Fusion Financials Online Training
Big Data and Hadoop Training In Hyderabad
oracle fusion financials classroom training
Workday HCM Online Training
Oracle Fusion HCM Classroom Training
Workday HCM Online Training
Private tutor Tampa good work