OPENCV RGB Colors tutorial, color channel intensity given by slider
Opencv C++ simple tutorial about the colors and color channels. There are a couple of tricks you can play with in Opencv. It is fun and easy to use to achieve color mixing and gain the channel by for example slide bar.. Enjoy the coding.
Opencv installation in Visual Studio 2015
You can simply prepare the project inside the Visual Studio 2015 by Nuget Packages. This approach is easy for beginners and better than standard installation with all the environmental variables problems. Just follow the installation steps inside here

Opencv colors introduction
I always forget what is the right order of colors in the OpenCV. The purpose of this short tutorial is different. It is not necessary to know if the blue rectangle in RGB should be defined like [255, 0 , 0] or [0, 0 , 255] . Hopefully, it is still BGR which means blue, green, and red channels. Just to be clear and sure that anyone understands. You can change that order but for no reason the default order is BGR.There is more color space available in OpenCV and in practice, there is a reason for that. There is also different scales for each color.
The example is simple. BLUE should be 0 to 255 for the min and max value of the channel (CV_8U). The same blue color can have the same min and max visual levels but the color is divided into more steps 0 to 65535(CV_16U).
Opencv color space transformation basics
There is also a pure grayscale. GRAY is equal to a small piece of blue plus a small piece of green and a small piece of the last one. Something like Gray = 0.3 x R + 0.3 x G + 0.3 x B. OK constants are different but who cares if there is 0.299 in the R channel and lots of green color. This is it in principle.
Also, there are many more color spaces. Some of them are better because of let's say endurance against the intensity of light conditions.
But all you need to know in the beginning is just the cvtColor command.
Comand has 3 parameters. Input_Image and output_Image and from_to_color_space.
cvtColor( YourMat, YourOutputMat, CV_BGR2GRAY); sometimes in opencv 3.1 is only BGR2GRAY.
You can use transformation to CV_BGR2HSV and the back should be CV_HSV2BGR. ALL make sense but no BGR in the world, where everyone using RGB.
Opencv tutorial Video color mixing
In this
tutorial there is only one milestone. Learn this
IMage.at<Vec3b>(y, x)[0] to Access the pixel at Y and X position. !For 0 color channel.
and this
IMage.at<Vec3b>(y, x)[1] Same but different color.
and also
IMage.at<Vec3b>(y, x)[2] This should be Blue or Red that depends on Opencv's mood. Probably red.
In tutorial, we make a copy of the image by
OneImage.copyTo(SecondMatRepresentation);
Into that copy just insert the image retrieved by video capture and each pixel of each color channel just multiplied by the value of the slider.
Opencv dependencies
The code is well described and in the right setting of Opencv 3.1 installation works. For example, the easiest installation in Visual Studio is by NUGET packages described here
The proper setting of the video writer should be found Here. The only magic is the right installation and the proper size of the output image. Okay, codec also.
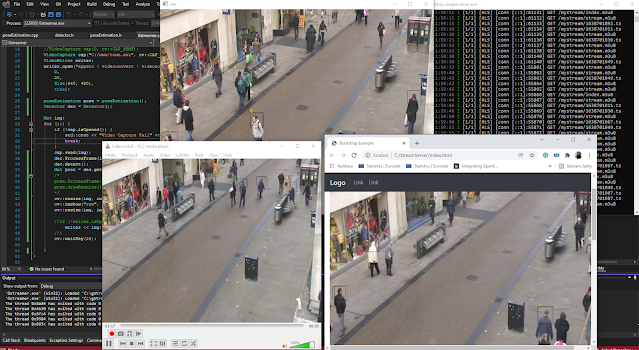
Opencv Video color channels example
Opencv tutorial code
#include "opencv2\highgui.hpp"
#include "opencv2\imgproc.hpp"
#include <vector>
#include <stdio.h>
#include <Windows.h>
#include <iostream>
using namespace cv;
using namespace std;
// slider globa value
int iSliderValue1 = 0;
int iSliderValue2 = 0;
int iSliderValue3 = 0;
int main(int argc, const char** argv)
{
// read video or cap(0) the web cam
VideoCapture cap("mov.MOV");
//prepare the writer for output
VideoWriter outputVideo;
outputVideo.open("video4.wmv", CV_FOURCC('W', 'M', 'V', '2'), 30, Size(1280, 960), true);
for (;;)
{
bool Is = cap.grab();
if (Is == false) {
cout << "Video Capture Fail" << endl;
break;
}
else {
Mat img;
Mat Original;
cap.retrieve(img, CV_CAP_OPENNI_BGR_IMAGE);
resize(img, img, Size(1280, 960));
img.copyTo(Original);
// we got a video in img and its copy in Original
// Lets access all pixels in X and Y (Y,X) and also visit all colors [0-2]
for (int x = 0; x < img.cols -1 ; x++)
{
for (int y = 0; y < img.rows -1 ; y++)
{
//Rewrite Original copy by IMG multipy by some value based on SLIDER value
Original.at<Vec3b>(y, x)[0] = img.at<Vec3b>(y, x)[0]* (iSliderValue1 )/200 ;
// Do it for another color
Original.at<Vec3b>(y, x)[1] = img.at<Vec3b>(y, x)[1]* (iSliderValue2 )/200 ;
// If you wat also for the last one
Original.at<Vec3b>(y, x)[2] = img.at<Vec3b>(y, x)[2]* (iSliderValue3 )/200 ;
}
}
// Simple slider , parameters are some description R, G and B
// also some window prew, and update some value
// the last parameter 215 is maximum value.....
createTrackbar("R", "prew", &iSliderValue1, 215);
createTrackbar("G", "prew", &iSliderValue2, 215);
createTrackbar("B", "prew", &iSliderValue3, 215);
// show the result
namedWindow("prew", WINDOW_AUTOSIZE);
imshow("prew", Original);
// write the output
outputVideo << Original;
int key1 = waitKey(20);
}
}
}
Share if you like it... Thanks :)