
Simple Opencv tutorial for yolo darknet object detection in DNN module
This tutorial will teach you how to use deep neural networks by Yolo Darknet to detect multiple classes of objects. The code is under 100 lines of simple code. The code uses yolov3-tiny.weights of neural network and appropriate configuration yolov3-tiny.cfg. The code is presented as simple as possible, without the staff nice to have, but not necessary to understand the flow of the code.
 |
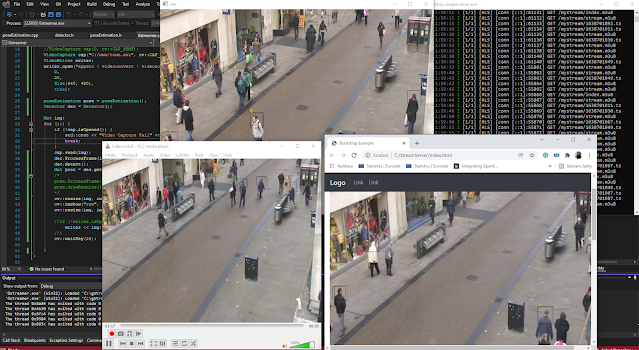
| Yolo darknet in opencv |
OpenCV 4.x requirements for DNN module running Yolo (yolov3-tiny)
I am using OpenCV 4.2 compiled on Windows machines with contribution modules. I do not compile OpenCV with any special backend, like Cuda, etc. You can find the description of how to compile OpenCV by CMake for Visual Studio 2019 here on my blog. Just exclude the GStreamer-related specialties.
How to set up Opencv Visual Studio 2019 Project
This is very common. No big deal here. In project properties for Release configuration and Platform for x64 the additional include directories point into location to include directory under your OpenCV installation.


The list of additional dependencies contains the standard .lib as on the following picture and one from the extra modules opencv_dnn420.lib.

Prerequisites for OpenCV DNN to run Yolo neural networks
The following yolov3-tiny.weights, yolov3-tiny.cfg needs to be downloaded from Yolo darknet site. The first one contains the weight values of the neural network and the second .cfg the configuration. I put these two into the same directory, where Visual Studio is generating .exe file for my project.
- yolov3-tiny.weights
- yolov3-tiny.cfg
We have all the needed prerequisites.


the cv::dnn::Net class allows you to create various deep neural network structures, based on the types of implemented layers. The Net class is initialized by readNet function that reads network represented by various formats.
The first parameter of readNet is the location of the neural network model - weights definition, the second parameter is the configuration of the network and the last is the name of the framework (darknet in our example).
The model supported in readNet:
The config supported in readNet:
DNN_TARGET_CPU
DNN_TARGET_OPENCL
DNN_TARGET_OPENCL_FP16
DNN_TARGET_MYRIAD
DNN_TARGET_FPGA
The network is not loaded and Net class should be successfully initialized.
 |
| I am using YOLOv3-tiny model |
Visual Studio project structure for Opencv DNN
I will show you, where the models are located and how to load them. This is why this chapter s located after the Yolo models are downloaded. The structure of my Visual Studio project is as follows. DNN is the root directory for my project. Under DNN is one DNN.sln solution, and two DNN and x64. The source code is located under DNN and the executable file is located in x64/Release. This depends if you are building a project in a release or debug setting in Visual Studio.
In the release directory is the executable module DNN.exe. The opencv_xxxxxx420.dll is located in this folder for simplicity. You can skip the specification of the path system variable in this case. I have located here the input video samp.MOV. The last important thing is that yolo3-tiny.weights and yolo3-tiny.cfg downloaded from Yolo website are located here as well.

Opencv DNN running Yolo darknet code high-level picture
int main()
{
//* video capture setting
//* basic parameters
//* path to load model
//* load neural network and config
//* Set backend and target to execute network
for (;;)
{
if (!cap.isOpened()) {
cout << "Video Capture Fail" << endl;
break;
}
//* capture image
Mat img;
cap >> img;
//* create blob from image
//* Set blob as input of neural network.
//* perform network.forward evaluation
//* process the output layer evaluation
// region proposal (most difficult step)
//* display image
}
return 0;
}
Opencv yolo darknet DNN code explanation in detail
I will skip some details about VideoCapture from the file. The code related to DNN started by:
std::string model = "C:/Users/Vlada/Desktop/DNN/x64/Release/yolov3-tiny.weights";
std::string config = "C:/Users/Vlada/Desktop/DNN/x64/Release/yolov3-tiny.cfg";
Net network = readNet(model, config,"Darknet");
network.setPreferableBackend(DNN_BACKEND_DEFAULT);
network.setPreferableTarget(DNN_TARGET_OPENCL);
the cv::dnn::Net class allows you to create various deep neural network structures, based on the types of implemented layers. The Net class is initialized by readNet function that reads network represented by various formats.
The first parameter of readNet is the location of the neural network model - weights definition, the second parameter is the configuration of the network and the last is the name of the framework (darknet in our example).
The model supported in readNet:
*.caffemodel (Caffe, http://caffe.berkeleyvision.org/)
*.pb (TensorFlow, https://www.tensorflow.org/)
*.t7 | *.net (Torch, http://torch.ch/)
*.weights (Darknet, https://pjreddie.com/darknet/)
*.bin (DLDT, https://software.intel.com/openvino-toolkit)
*.onnx (ONNX, https://onnx.ai/)
*.prototxt (Caffe, http://caffe.berkeleyvision.org/)
*.pbtxt (TensorFlow, https://www.tensorflow.org/)
*.cfg (Darknet, https://pjreddie.com/darknet/)
*.xml (DLDT, https://software.intel.com/openvino-toolkit)
Net class .setPreferableBackend(DNN_BACKEND_DEFAULT)
This set computational backend for DNN. The best is to use the default value. If you build OpenCV with Inference engine by intel the default is DNN_BACKEND_INFERENCE_ENGINE. The DNN_BACKEND_HALIDE is a popular backend but a little bit difficult to build on a windows machine. This backend is built in LLVM compiler. I have issues to properly build OpenCV by LLVM with HALIDE computational backend. Just default is the best for the start.
Net class .setPreferableTarget(DNN_TARGET_OPENCL)
This represents the build target that can speed up your computation by special hardware instructions of the target. I will try to use just the first three if your architecture allows.
DNN_TARGET_CPU
DNN_TARGET_OPENCL
DNN_TARGET_OPENCL_FP16
DNN_TARGET_MYRIAD
DNN_TARGET_FPGA
The network is not loaded and Net class should be successfully initialized.
Opencv blobFromImage preprocessing for yolov3-tiny
The yolo3-tiny.cfg using the input layer of scale 416 x 416. This is reflected in blobFromImage, where input img is processed into blob 4D array. The width and height Size(416, 416)of the input layer. The blobFromImage is using an image as the first argument and produces output blob as the second argument of the function. The third argument is normalization. I am performing normalization after on network.setInput in scale parameter. This mean that the normalization of the blob is not needed the 1 to 1 with the original image. The fourth argument is the Size, which needs to match the size of input layer. Since OpenCV sometimes using BGR color schema instead of RGB. The swapRB is needed and produces exactly BGR -> RGB transformation of color channels.

The input blob needs to be normalized (RGB is color scale 0-255 for each channel). This normalization is into float from 0 - 1, The scale parameter normalizes all intensity values into the range of 0-1 of blobFromImg in the function network.setInput( , , scale, ) parameter. The mean subtraction
value. We can ignore the mean, but the scale is important. The general normalization of the blob in
setInput follows this equation: input(n,c,h,w)=scalefactor×(blob(n,c,h,w)−mean).
network.setInput(blobFromImg, "", scale, mean););
The input is set and neural network forward evaluation can be performed.

The input blob needs to be normalized (RGB is color scale 0-255 for each channel). This normalization is into float from 0 - 1, The scale parameter normalizes all intensity values into the range of 0-1 of blobFromImg in the function network.setInput( , , scale, ) parameter. The mean subtraction
value. We can ignore the mean, but the scale is important. The general normalization of the blob in
setInput follows this equation: input(n,c,h,w)=scalefactor×(blob(n,c,h,w)−mean).
bool swapRB = true;
blobFromImage(img, blobFromImg, 1, Size(416, 416), Scalar(), swapRB, false);
float scale = 1.0 / 255.0;
Scalar mean = 0;
Evaluate Yolo neural network model
The following code will take input set in the previous step and perform forward evaluation through the network. The output is written into a preprepared outMat Mat container.
Mat outMat;
network.forward(outMat);
Mat outMat;
network.forward(outMat);
Display results of yolo (yolov3-tiny) neural network
I think This is the most difficult part. Do not be afraid of this step at all. The outMat.rows and cols just evaluate the dimension of the output matrix.
// rows represent number of detected object (proposed region)
int rowsNoOfDetection = outMat.rows;
// The columns looks like this, The first is region center x, center y, width
// height, The class 1 - N is the column entries, which gives you a number,
// where the biggest one corresponding to most probable class.
// [x ; y ; w; h; class 1 ; class 2 ; class 3 ; ; ;....]
//
int colsCoordinatesPlusClassScore = outMat.cols;
ONE row is exactly one region. The Yolo darknet output is a region proposal. One row is one region and the number of rows is a number of the proposed regions to consider. The row looks like this.
[x ; y ; w; h; class 1 ; class 2 ; class 3 ; ; ;....]
The x y w h values are the coordinates, width, and height of the proposed region. Class 1; to class n is the number that evaluates the most probable class of detected object in this concrete region. This is super simple. Just have a look at the example. Yolo region proposal format
This outMat has 3 rows and 7 columns. This means 3 proposed regions with the detected object.
You can need to find the highest score from column 5 to column 7. For the first row is the car, the second is the bus and the last is the truck. There is not a car bus and truck in the column. This is just the index of the score that belongs to the class. After you find the highest score, You will perform evaluation if this score is higher than your threshold. If yes, you can take the first four columns to write the rectangle. You can name the rectangle based on index of the higher score.
[x ; y ; w; h; car 0.1 ; bus 0 ; truck 0.01][x ; y ; w; h; car 0 ; bus 0.9 ; truck 0.4]
[x ; y ; w; h; car 0 ; bus 0.3 ; truck 0.9]
This for loops process the rows (proposed regions one by one). The Mat called scores is just one row(j) from column 5 up to the size (number of columns). We are just skipping the information about the region coordinates.
for (int j = 0; j < rowsNoOfDetection; ++j)
{ // for each row, the score is from element 5 up to number of classes index
//(5 - N columns)
Mat scores = outMat.row(j).colRange(5, colsCoordinatesPlusClassScore);
for (int j = 0; j < rowsNoOfDetection; ++j)
{ // for each row, the score is from element 5 up to number of classes index
//(5 - N columns)
Mat scores = outMat.row(j).colRange(5, colsCoordinatesPlusClassScore);
The following code find the maximum in the score matrix and put into confidence variable and Position of the maximum to the PositionOfMax variable.
Point PositionOfMax;
double confidence;
minMaxLoc(scores, 0, &confidence, 0, &PositionOfMax);
Display the Yolo region proposal results
If the confidence passes the threshold 0.0 somethink. The region can be displayed. Now The first four elements of outMat row can be valuable. outMat.at<float>(j, 0) takes firs element of j row. the (j,1) takes the y, (j,2) takes width and the last fourth element of the row is height. Based on the calculated values the rectangle is displayed over the image. The position of the max is transferred into the string, which is the numeric value of the image. If you want to have a name instead of the numeric representation of the class. You need to have a table to translate 1 to Car for each class.
if (confidence > 0.0001)
{
int centerX = (int)(outMat.at<float>(j, 0) * img.cols);
int centerY = (int)(outMat.at<float>(j, 1) * img.rows);
int width = (int)(outMat.at<float>(j, 2) * img.cols+20);
int height = (int)(outMat.at<float>(j, 3) * img.rows+100);
int left = centerX - width / 2;
int top = centerY - height / 2;
stringstream ss;
ss << PositionOfMax.x;
string clas = ss.str();
int color = PositionOfMax.x * 10;
putText(img, clas, Point(left, top), 1, 2, Scalar
(color, 255, 255), 2, false);
stringstream ss2;
ss << confidence;
string conf = ss.str();
rectangle(img, Rect(left, top, width, height),
Scalar(color, 0, 0), 2, 8, 0);
OpenCV DNN Yolo darknet full tutorial code sample for yolov3-tiny
#include <iostream>
#include <opencv2/opencv.hpp>
#include <opencv2/highgui.hpp>
#include <opencv2/video.hpp>
#include <opencv2/dnn.hpp>
#include <opencv2/videoio.hpp>
#include <opencv2/imgproc.hpp>
using namespace cv;
using namespace std;
using namespace dnn;
int main()
{
VideoCapture cap("C:/Users/Vlada/Desktop/DNN/x64/Release/samp.MOV");
std::string model = "C:/Users/Vlada/Desktop/DNN/x64/Release/yolov3-tiny.weights"; //findFile(parser.get<String>("model"));
std::string config = "C:/Users/Vlada/Desktop/DNN/x64/Release/yolov3-tiny.cfg"; //findFile(parser.get<String>("config"));
Net network = readNet(model, config,"Darknet");
network.setPreferableBackend(DNN_BACKEND_DEFAULT);
network.setPreferableTarget(DNN_TARGET_OPENCL);
for (;;)
{
if (!cap.isOpened()) {
cout << "Video Capture Fail" << endl;
break;
}
Mat img;
cap >> img;
static Mat blobFromImg;
bool swapRB = true;
blobFromImage(img, blobFromImg, 1, Size(416, 416), Scalar(), swapRB, false);
cout << blobFromImg.size() << endl;
float scale = 1.0 / 255.0;
Scalar mean = 0;
network.setInput(blobFromImg, "", scale, mean);
Mat outMat;
network.forward(outMat);
// rows represent number of detected object (proposed region)
int rowsNoOfDetection = outMat.rows;
// The coluns looks like this, The first is region center x, center y, width
// height, The class 1 - N is the column entries, which gives you a number,
// where the biggist one corrsponding to most probable class.
// [x ; y ; w; h; class 1 ; class 2 ; class 3 ; ; ;....]
//
int colsCoordinatesPlusClassScore = outMat.cols;
// Loop over number of detected object.
for (int j = 0; j < rowsNoOfDetection; ++j)
{
// for each row, the score is from element 5 up
// to number of classes index (5 - N columns)
Mat scores = outMat.row(j).colRange(5, colsCoordinatesPlusClassScore);
Point PositionOfMax;
double confidence;
// This function find indexes of min and max confidence and related index of element.
// The actual index is match to the concrete class of the object.
// First parameter is Mat which is row [5fth - END] scores,
// Second parameter will gives you min value of the scores. NOT needed
// confidence gives you a max value of the scores. This is needed,
// Third parameter is index of minimal element in scores
// the last is position of the maximum value.. This is the class!!
minMaxLoc(scores, 0, &confidence, 0, &PositionOfMax);
if (confidence > 0.0001)
{
// thease four lines are
// [x ; y ; w; h;
int centerX = (int)(outMat.at<float>(j, 0) * img.cols);
int centerY = (int)(outMat.at<float>(j, 1) * img.rows);
int width = (int)(outMat.at<float>(j, 2) * img.cols+20);
int height = (int)(outMat.at<float>(j, 3) * img.rows+100);
int left = centerX - width / 2;
int top = centerY - height / 2;
stringstream ss;
ss << PositionOfMax.x;
string clas = ss.str();
int color = PositionOfMax.x * 10;
putText(img, clas, Point(left, top), 1, 2, Scalar(color, 255, 255), 2, false);
stringstream ss2;
ss << confidence;
string conf = ss.str();
rectangle(img, Rect(left, top, width, height), Scalar(color, 0, 0), 2, 8, 0);
}
}
namedWindow("Display window", WINDOW_AUTOSIZE);// Create a window for display.
imshow("Display window", img);
waitKey(25);
}
return 0;
}


Hey BRO fix UR CODE : https://stackoverflow.com/questions/78628975/error-assertion-failed-dims-2-in-cvmatsizeoperator-file-d-vcpkg ... before you make tutorials , but thanks anyway
your code doesnt work in debug