Opencv HSL video stream to web

This tutorial will show you all the components, configuration, and code needed to steam video output results from Opencv C++ to your Web player. The C++ program will take any video input and process this video. The processed video will be streamed outside of OpenCV using the GStreamer pipeline (Windows part). The HLS video produces one Playlist file and several MPEG-TS segments of videos. HLS outputs are stored in the Windows file system. I am using WSL 2, a Windows Subsystem for Linux to run the Ubuntu distribution. Here the NGINX is installed with the RTMP module. NGINX is distributing a video stream from the Windows file system to the web.  Let's have a look at this in more detail. 

What is covered?

  • Opencv C++ part + GStreamer pipeline
  • NGINX configuration
  • Architecture
  • Web Player for your HLS stream
What is not covered?

opencv web stream

The architecture of the streaming system

This reads video from a file or video stream by VideoCapture cap("/samp.MOV");
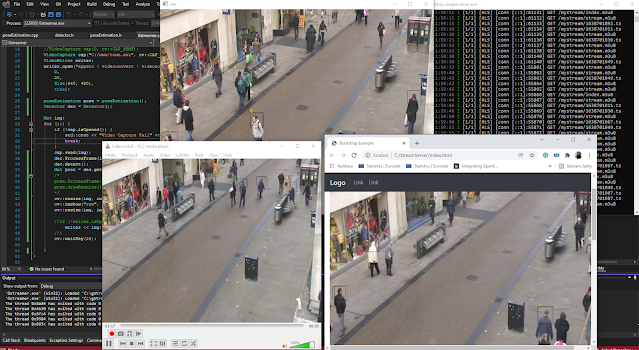
Video is processed in the C++ app. In my case, there is a very simple Yolo Darknet detector implemented. The results of the detector are written into the video frame. The processed video frame is pushed to GStreamer pipeline used in the OpenCV VideoWriter writer. The HLS pipeline stores HLS fragments and playlists on the Windows file system. The NGINX server in UBUNTU WLS 2 distributes this content from the Windows file system to the web. This is possible as the file system from Windows c:/ is reachable under /mnt/c/.

opencv hls streaming

Installation and prerequisites for the Opencv app

1) Compile OpenCV with GStreamerGStreamer OpenCV on Windows or Here.

2) Enable WSL 2 virtualization in Windows. Install Ubuntu 20.04.1. I tested WSL 2. I am not sure about the WSL 1 file system sharing with Windows. 

3) NGINX with RTMP module in UBUNTU WSL 2

There are some standard prerequisites like Visual Studio 2019. Knowledge of Linux and be able to find documentation to enable WSL 2 and install NGINX with RTMP module. It is a lot. 

HLS protocol brief introduction 

HLS stands for HTTP Live Streaming. The protocol was introduced by Apple and become quite popular over the years. The major advantage is the ability to adapt the video streams based on network throughput. The HLS in version lower than 4 is putting video into the MPEG-TS containers. This file with .TS is holding the actual media content. The TS are segments of videos with defined length. The video segments are organized in the playlist. The playlist holds the reference to the MPEG-TS segments. 

Advantages of HTTP streaming

One of the significant advantages is the HTTP protocol itself. The HTTP can traverse easily the firewall and proxy servers. This is the main advantage over the UDP-based RTP and RTSP protocol. The standard support as well as a secured transfer based on HTTPS.

HLS MPEG-TS

The video in GStreamer is encoded by H.264 together with other audio coded and placed into a file container called MPEG-2 Transport Stream. The stream chunks are of the same length as defined in GStreamer.  

HLS playlist M3U8

This simply refers to concrete file.TS to play the actual video content.

GStreamer Opencv pipeline

GStreamer needs to be properly set up, all environmental path variables need to be correct and OpenCV needs to be compiled with OpenCV. ! To use x264enc and his use full installation of GStreamer and not the recommended one. The standard OpenCV VideoWriter pipeline can look like this. Appssrc means that your C++ OpenCV program is the source for GStreamer. Then the following values are video conversion and scale. The x264enc is the encoding of the video output and is packed in mpegtsmux containers (ts segments). HLSSINK then produces an HLS playlist and TS segments from your video. You need to point to the location shared with your UBUNTU in the location and playlist. This will produce several ts segments and one playlist. The Playlist root is the value that needs to be updated based on IP and PORT. 172.22.222.39:8080 is IP and PORT depends on the NGINX and UBUNTU networking setup. This value is stored in the playlist and points to concrete TS segments. Both Playlist and Segments then need to be correctly served by the NGINX server.

Videowriter GStreamer pipeline example

VideoWriter writer(
        "appsrc ! videoconvert ! videoscale ! video/x-raw,width=640,height=480
        ! x264enc ! mpegtsmux !
        hlssink playlist-root=http://172.22.222.39:8080/live/
        location=C:/streamServer/hls/segment%05d.ts
        playlist-location=C:/streamServer/hls/playlist.m3u8",
        0,
        20,
        Size(800, 600),
        true);

Just remember to update locations and IP and PORTS in this example as described in previous text.

How to deliver a Playlist and content?

The content stored in Windows location C:/streamServer/hls/ needs to be enabled and reachable by a simple web player. This requires the server to provide a few things. 1) Web page with your simple video player. 2) The HLS playlist and ts segments are reachable under same IP address. This task is fully under the control of the NGINX server running under Ubuntu in WSL 2. The NGINX needs to be compiled with RTMP module. 

I am not an expert on NGINX. HLS is on in my rtmp module and hls_path points to the location of the content generated from opencv. 

hls_path /mnt/c/streamServer/hls

In part related to HTTP is server enabled to port 8080 of the local host, where index.html is available under / location and hls playlist is available under /live

NGINX config for HLS streaming


#user  nobody;
worker_processes  auto;

#error_log  logs/error.log;
#error_log  logs/error.log  notice;
#error_log  logs/error.log  info;
#pid        logs/nginx.pid;


events {
    worker_connections  4;
}
#
rtmp { 
    server { 
        listen 1935
        application live { 
            live on
            allow publish 127.0.0.1;
            allow publish all;
            allow play all;
            interleave on;
            hls on
            #Path where fragments want to go
            hls_path /mnt/c/streamServer/hls
            hls_fragment 15s
            dash on;
            dash_path /mnt/c/streamServer/dash;
            dash_fragment 15s;
        } 
    } 

http {
    default_type  application/octet-stream;
    sendfile        on;
    keepalive_timeout 65;
    server {
        listen       8080;
        server_name localhost;
        location / {
            root   /mnt/c/streamServer;
            index  index.html index.htm;
        }
         location /live {
             types {
                application/vnd.apple.mpegurl m3u8;
                video/mp2t ts;
                text/html html;
            }
            alias   /mnt/c/streamServer/hls;
            add_header Cache-Control no-cache;
          }
          location /tvds {
            root   /mnt/c/streamServer/dash;
            add_header Cache-Control no-cache;
          }
    }
}

Web player

I just found some examples based on video.js and videojs-contrib-hls/5.14.1/videojs-contrib-hls.js specifically for HLS. All you need to change is IP:PORT address in the video HTML element src="http://172.22.222.39:8080/live/playlist.m3u8. This is exactly the same location set by NGINX to serve the playlist.

         location /live {
             types {
                application/vnd.apple.mpegurl m3u8;
                video/mp2t ts;
                text/html html;

<!-- CSS  -->
<link href="https://vjs.zencdn.net/7.2.3/video-js.css" rel="stylesheet">

<!-- HTML -->
<video id='hls-example'  class="video-js vjs-default-skin" width="800" height="600" controls>
<source type="application/x-mpegURL" src="http://172.22.222.39:8080/live/playlist.m3u8">
</video>

<!-- JS code -->
<!-- If you'd like to support IE8 (for Video.js versions prior to v7) -->
<script src="https://vjs.zencdn.net/ie8/ie8-version/videojs-ie8.min.js"></script>
<script src="https://cdnjs.cloudflare.com/ajax/libs
/videojs-contrib-hls/5.14.1/videojs-contrib-hls.js"></script>
<script src="https://vjs.zencdn.net/7.2.3/video.js"></script>

<script>
var player = videojs('hls-example');
player.play();
</script>

C++ opencv gstreamer windows part

The input video from video capture is processed by the Yolo darknet neural network. you can find more about this Yolo darknet detection. VideoWriter writer is using the discussed gstreamer pipeline and once the video is processed the output is pushed to the pipeline just like this.

resize(img, img, Size(800600));
        writer.write(img);

Just be sure that the size of the input image and the sizes in your pipeline match. Remember to change IP and PORT as discussed in the chapter about pipeline and NGINX.


#include <iostream>
#include <opencv2/opencv.hpp>
#include <opencv2/highgui.hpp>
#include <opencv2/video.hpp>
#include <opencv2/dnn.hpp>
#include <opencv2/videoio.hpp>
#include <opencv2/imgproc.hpp>
#include <opencv2/core.hpp>
#include <opencv2/imgcodecs.hpp>
#include <opencv2/imgproc.hpp>
#include <opencv2/photo.hpp>

using namespace cv;
using namespace std;
using namespace dnn;

int main()
{
    VideoWriter writer(
        "appsrc ! videoconvert ! videoscale ! video/x-raw,width=640,height=480 
! x264enc ! mpegtsmux ! hlssink playlist-root=http://172.22.222.39:8080/live/
 location=C:/streamServer/hls/segment%05d.ts
 playlist-location=C:/streamServer/hls/playlist.m3u8 ",
        0,
        20,
        Size(800600),
        true);

    VideoCapture cap("/samp.MOV");
    std::string model = "/yolov3-tiny.weights";  
    std::string config = "/yolov3-tiny.cfg"; 
    Net network = readNet(model, config, "Darknet");
    network.setPreferableBackend(DNN_BACKEND_DEFAULT);
    network.setPreferableTarget(DNN_TARGET_OPENCL);

    for (;;)
    {
        if (!cap.isOpened()) {
            cout << "Video Capture Fail" << endl;
            break;
        }
        Mat img;
        cap >> img;
        static Mat blobFromImg;
        //blobFromImage(img, blobFromImg, 1.0, Size(Width, Height), Scalar(), swapRB, false, CV_8U);
        //network.setInput(blobFromImg, "", scale, mean);
        bool swapRB = true;
        blobFromImage(img, blobFromImg, 1Size(416416), Scalar(), swapRB, false);
        cout << blobFromImg.size() << endl;
        float scale = 1.0 / 255.0;
        Scalar mean = 0;
        network.setInput(blobFromImg, "", scale, mean);
        Mat outMat;
        network.forward(outMat);
        // rows represent number of detected object (proposed region)
        int rowsNoOfDetection = outMat.rows;

        // The columns looks like this, The first is region center x, center y, width
        // height, The class 1 - N is the column entries, which gives you a number, 
        // where the biggest one corresponding to most probable class. 
        // [x ; y ; w; h; class 1 ; class 2 ; class 3 ;  ; ;....]
        // [x ; y ; w; h; class 1 ; class 2 ; class 3 ;  ; ;....]
        int colsCoordinatesPlusClassScore = outMat.cols;


        // Loop over the number of the detected objects. 
        for (int j = 0; j < rowsNoOfDetection; ++j)
        {
            // for each row, the score is from element 5 up to number of classes
  //index (5 - N columns)
            Mat scores = outMat.row(j).colRange(5, colsCoordinatesPlusClassScore);
            Point PositionOfMax;
            double confidence;

            // This function find indexes of min and max confidence and related
// index of element. 
            // The actual index is matched the concrete class of the object.
            // First parameter is Mat which is row [5fth - END] scores,
            // Second parameter will give you the min value of the scores. NOT needed 
            // confidence gives you a max value of the scores. This is needed, 
            // Third parameter is index of minimal element in scores
            // the last is the position of the maximum value. This is the class!!
            minMaxLoc(scores, 0, &confidence, 0, &PositionOfMax);

            if (confidence > 0.0001)
            {
                int centerX = (int)(outMat.at<float>(j, 0) * img.cols); 
// thease four lines are
                int centerY = (int)(outMat.at<float>(j, 1) * img.rows); 
// first column of the tow
                int width = (int)(outMat.at<float>(j, 2) * img.cols + 20); 
// identify the position 
                int height = (int)(outMat.at<float>(j, 3) * img.rows + 100); 
// of proposed region
                int left = centerX - width / 2;
                int top = centerY - height / 2;


                stringstream ss;
                ss << PositionOfMax.x;
                string clas = ss.str();
                int color = PositionOfMax.x * 10;
                putText(img, clas, Point(left, top), 12Scalar(color, 255255), 2false);
                stringstream ss2;
                ss << confidence;
                string conf = ss.str();
                
                rectangle(img, Rect(left, top, width, height), Scalar(color, 00), 280);
            }
        }
        resize(img, img, Size(800600));
        namedWindow("Display window", WINDOW_AUTOSIZE);// Create a window for display.
        imshow("Display window", img);
        waitKey(25);
        resize(img, img, Size(800600));
        writer.write(img);
    }

}

YouTube tutorial about problems with Opencv HLS streaming

This tutorial will show you the main problems during the development of such a streaming service.


Next Post Previous Post
No Comment
Add Comment
comment url